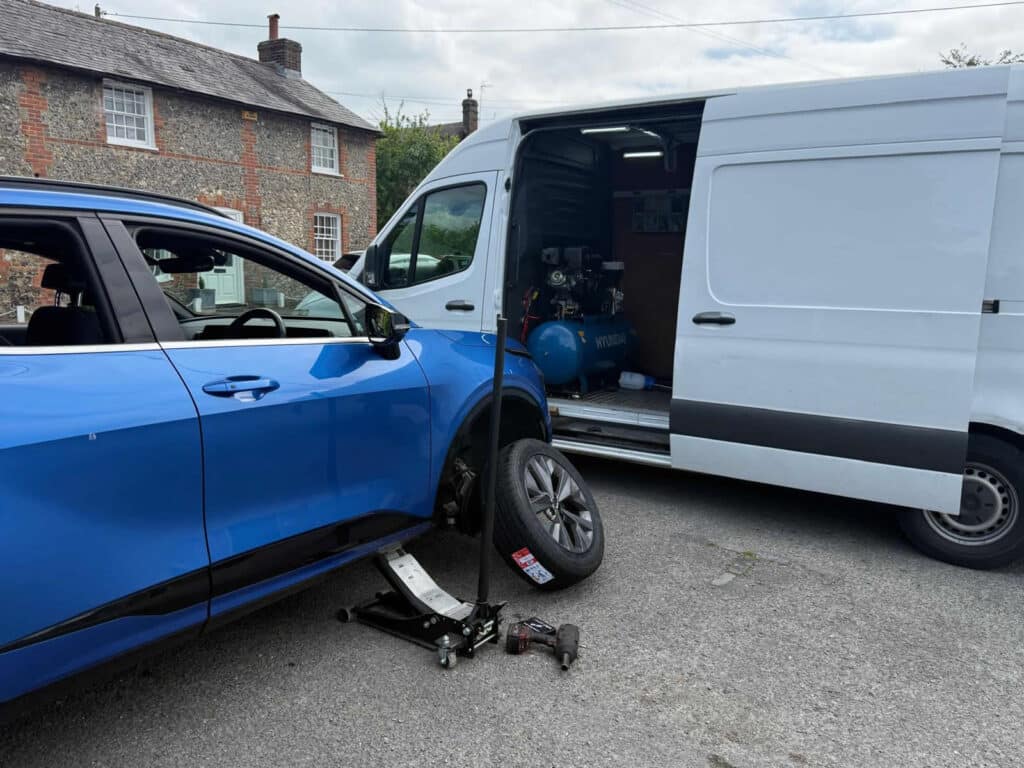
Changing a tyre might seem like a daunting task, but with the right guidance and tools, you can handle your own tyre fittings with ease. Whether you’re stuck on the roadside or simply want to save some money on service charges, understanding how to fit your own tyres can be incredibly beneficial. Additionally, with the advent of services like Mobile Tyre delivery and fitting, having some basic knowledge of tyre changing can help you handle unexpected situations more confidently. In this guide, we’ll walk you through each step of the process, ensuring you can safely and effectively fit a tyre yourself.
Gather All Necessary Tools and Materials
Proper preparation is key to a smooth tyre fitting process, so gather all the essential tools and materials before you start. You will need a lug wrench for loosening and tightening the lug nuts, a jack to lift the vehicle, and a jack stand for additional support. A tyre pressure gauge will help you ensure the correct tyre pressure, while a torque wrench is necessary for tightening the lug nuts to the manufacturer’s specified settings. Don’t forget the new tyre, which should be of the correct size and type for your vehicle. Having these tools and materials within easy reach will make the process more efficient and prevent unnecessary delays.
Ensure Your Vehicle Is on a Flat Surface
Before you start lifting your vehicle or loosening any wheel nuts, make sure you’re working on a flat, stable surface. This precaution is crucial for maintaining stability and ensuring your safety while performing the tyre fitting. Avoid areas with slopes or uneven ground, as these conditions can cause the car to slip off the jack, which could lead to serious injuries or damage to your vehicle.
Select a location that is level and solid, such as a driveway or a flat section of road. Gravel, soft soil, or uneven pavement can compromise the stability of your jack and jack stands, making the task significantly more dangerous. If you’re on the roadside, take extra care to find the flattest area possible and use hazard lights to alert other drivers of your presence.
Once you’ve found a suitable flat surface, engage the parking brake to add an extra layer of security. This step is especially important if you’re working on a slight incline or if there’s any risk of the vehicle moving while it’s elevated. In addition to the parking brake, you can use wheel chocks or heavy objects like bricks placed behind the wheels to further prevent any unwanted movement.
Ensuring that your vehicle is on a flat surface provides a stable working environment, making it easier and safer to lift the car and remove the tyre. Stability is key, as any wobbling or shifting could result in the car falling off the jack, endangering you and potentially damaging your vehicle.
Double-checking that your working surface is flat and secure is a simple but vital step in the tyre fitting process, laying a solid foundation for the tasks that follow. This attention to detail will help you avoid common pitfalls and ensure a smoother, safer tyre fitting experience.
Loosen the Lug Nuts Before Lifting the Vehicle
Before you raise your vehicle, it’s crucial to slightly loosen the lug nuts on the tyre you plan to change. Begin by fitting the lug wrench onto a lug nut and turning it anti-clockwise. Applying force while the tyre is still in contact with the ground utilises the vehicle’s weight to stabilise the wheel, making this task significantly easier. Remember, the objective here is to merely break the initial resistance; you don’t need to fully remove the lug nuts at this stage.
Position the lug wrench properly to get the best leverage, and if necessary, use your foot to apply additional force, but ensure you maintain your balance. Be cautious not to overexert yourself to avoid injury. You might find that some lug nuts are tighter than others, which is perfectly normal. Rotate through each lug nut systematically, loosening them just enough so they can be easily unscrewed later when the vehicle is lifted.
Using a star pattern or a crisscross sequence is recommended when loosening the lug nuts. This technique helps distribute the tension evenly across the wheel, minimising the risk of warping the brake rotor or the wheel itself. Start with one lug nut, move diagonally to the next, and continue this pattern until all the nuts are adequately loosened.
It’s important to keep in mind that proper preparation at this stage will streamline the tyre-changing process. By taking the time to loosen the lug nuts before lifting the vehicle, you’ll find it easier and safer to proceed with the subsequent steps, ensuring a smoother experience overall.
Safely Lift the Vehicle Using a Jack
Once the wheel nuts are loosened, position your jack at the appropriate jacking point for your vehicle. These jacking points are usually reinforced and indicated in your vehicle’s manual to ensure safe lifting. Position the jack under the designated area, ensuring it’s securely in place. Begin raising the vehicle slowly and steadily by turning the jack handle clockwise. Pay attention to the vehicle’s stability as you lift; it should rise evenly without any tilting or wobbling.
Lift the vehicle until the tyre is approximately 15 cm (6 inches) off the ground, providing enough clearance to remove the old tyre and fit the new one comfortably. Once the vehicle is lifted to the desired height, it’s crucial to place a jack stand under the car to provide additional support. Slide the jack stand under a solid part of the vehicle’s frame close to the jacking point. Lower the vehicle slightly onto the jack stand to ensure it bears some of the weight, but do not remove the jack completely.
Always double-check that the jack stand is positioned correctly and stable before proceeding. If you’re unsure, give the vehicle a gentle nudge to confirm it is secure. Never rely solely on the jack to hold the car’s weight as this poses a significant safety risk.
Keep in mind the importance of a well-maintained jack and jack stand. Inspect them regularly for any signs of wear or damage. A faulty or damaged jack can fail under the weight of the vehicle, leading to dangerous situations. Following these safety steps rigorously ensures that your vehicle is stable and secure, allowing you to continue with the tyre fitting process confidently and safely.
Once the vehicle is properly supported, you can move on to the next step: removing the old tyre from the wheel hub.
Remove the Old Tyre from the Vehicle
With your vehicle securely elevated and supported, proceed to fully remove the loosened wheel nuts by hand, ensuring they are kept in a safe place for later use. Once all the nuts are removed, grasp the tyre firmly and gently pull it towards you. Depending on how long the tyre has been on the wheel hub, it may require some wiggling or a bit of force to free it. If the tyre seems stuck, a gentle tap with a rubber mallet can help loosen it without causing damage.
After detaching the tyre, carefully lift it off the wheel hub and place it aside. This step exposes the wheel hub, giving you the opportunity to perform a brief inspection. Look out for any visible signs of wear, rust, or damage on the wheel hub and the brake components. Remove any debris or dirt that might be present, as these could interfere with the proper seating of the new tyre.
This is also an ideal moment to check the condition of the brake discs or drums and other visible parts of the braking system. Addressing any issues now can save you from future complications and ensure the continued safety and performance of your vehicle.
By keeping the removed wheel nuts in a safe, organised manner and carefully inspecting the wheel hub and brake components, you set the stage for a smooth and effective installation of your new tyre.
Inspect the Wheel and Brake Components
With the old tyre removed and the wheel hub exposed, take this opportunity to carefully inspect the wheel and brake components. Begin by examining the wheel hub for any signs of rust, debris, or damage that could interfere with the proper seating of the new tyre. Use a clean cloth to wipe away any dirt or grime, ensuring a smooth, clean surface for the new tyre to rest against.
Next, turn your attention to the brake components. Check the brake discs or drums for any visible signs of wear or damage. Look for grooves, scoring, or uneven surfaces, which could indicate the need for maintenance or replacement. If you notice any rust or corrosion on the brake components, clean them gently with a wire brush or appropriate cleaner.
Additionally, inspect the brake pads for thickness and wear. Worn-out brake pads can compromise your vehicle’s braking performance, so if they appear thin or uneven, it might be a good time to replace them. Examine the brake callipers for any leaks or damage, and ensure the brake lines are intact and free of cracks.
While inspecting these components, also check for any loose or missing bolts and ensure that all parts are securely fastened. Addressing these issues now will help prevent potential problems in the future, such as brake failure or uneven tyre wear.
Take your time during this inspection to ensure everything is in good working order. Paying close attention to the condition of the wheel and brake components not only extends the life of your tyres but also enhances the overall safety and performance of your vehicle. Remember, regular maintenance and timely inspections are key to avoiding unexpected breakdowns and ensuring a smooth, safe driving experience.
Position the New Tyre on the Wheel Hub
With the old tyre removed and your vehicle safely supported, it’s time to fit the new tyre onto the wheel hub. Begin by aligning the holes in the new tyre with the lug bolt positions on the hub. Carefully lift the tyre and slide it onto the hub, making sure the lug bolts pass through the holes evenly. Proper alignment is essential for a balanced ride and to prevent vibrations or uneven tyre wear.
Take your time to ensure the tyre is sitting flush against the wheel hub. You may need to wiggle it slightly to get it into the correct position. If you encounter resistance, avoid forcing it; instead, check to see if any debris or rust is obstructing the hub or the holes in the wheel. A clean surface is crucial for a secure fit, so wipe down any dirt or grime if necessary.
As you position the new tyre, make sure it sits evenly and doesn’t tilt to one side. An uneven tyre can lead to issues like imbalanced tyre wear and compromised handling. Ensure that all the lug bolts are fully inserted through the holes in the tyre and that the tyre sits flush against the hub.
Once the tyre is in place, it’s important to keep it steady while you prepare to secure it with the lug nuts. Holding the tyre in place, take one of the lug nuts and begin threading it onto the first lug bolt by hand. This will help keep the tyre from shifting as you work on securing the rest. Continue threading the remaining lug nuts onto their respective bolts by hand, making sure each one catches properly to prevent cross-threading, which could damage the bolts or nuts.
Now that the tyre is correctly positioned, you’re ready to move on to securing it properly with the lug nuts, ensuring even pressure and a safe fit.
Secure the New Tyre with Lug Nuts
With the new tyre positioned correctly, begin by threading the lug nuts onto the bolts by hand. This ensures they are properly aligned and reduces the risk of cross-threading, which can damage both the nuts and the bolts. Once each lug nut is securely threaded by hand, use your lug wrench to begin tightening them.
It’s crucial to tighten the lug nuts in a star pattern, which involves tightening one nut, then moving diagonally to the next one, and so on. This method distributes pressure evenly across the wheel and ensures that it sits flush against the hub. Begin with a snug fit rather than fully tightening each nut at this stage.
Once all the nuts are snug, go back and incrementally tighten them further using the same star pattern. This step-by-step tightening approach helps maintain even pressure, preventing the wheel from tilting or becoming misaligned. Apply steady pressure with the lug wrench, and if necessary, use your foot to assist, ensuring you maintain balance and control.
Make sure each lug nut is tightened to a similar degree before lowering the vehicle. While you don’t need to apply maximum force just yet, ensure the wheel feels secure and doesn’t wobble. Properly secured lug nuts are crucial for safe driving, so take your time to perform this step meticulously.
Following the correct sequence and method ensures that your new tyre is firmly in place and ready for the final torque adjustments once the vehicle is lowered.
Lower the Vehicle Carefully
With the new tyre secured, the next step is to carefully lower your vehicle back to the ground. Begin by using the jack to raise the vehicle slightly, just enough to comfortably remove the jack stand. Once the jack stand is out of the way, slowly and steadily lower the vehicle by turning the jack handle anti-clockwise. Make sure to keep a steady hand and control the descent to avoid any sudden drops that could destabilise the vehicle or damage the tyre.
As the tyre makes contact with the ground, continue to lower the jack until the vehicle’s full weight rests on the newly fitted tyre. It’s crucial to perform this step gradually to ensure that the tyre settles evenly. Any abrupt movement can shift the wheel’s position, potentially causing the lug nuts to loosen or the tyre to misalign.
Once the vehicle is completely lowered and the jack is no longer bearing any weight, remove the jack from under the vehicle. Double-check that the tyre is resting properly on the ground and that there is no wobbling or unevenness. This ensures the wheel is securely in place and ready for the final tightening of the lug nuts.
Taking these precautions while lowering the vehicle helps maintain stability and safety throughout the tyre fitting process, allowing you to proceed to the final tightening with confidence.
Tighten the Lug Nuts to the Correct Torque
Now that the vehicle is back on the ground, it’s important to tighten the lug nuts to the manufacturer’s specified torque settings using a torque wrench. Properly torqued lug nuts ensure that the wheel is securely attached, reducing the risk of it coming loose while driving.
Begin by setting your torque wrench to the recommended torque setting specified in your vehicle’s manual. Typically, this information can be found in the owner’s manual or sometimes on a label inside the driver’s side door frame. Each vehicle has specific torque requirements, so make sure you have the correct setting before proceeding.
Using a torque wrench, start tightening the lug nuts in the same star pattern used previously. This method continues to ensure even pressure distribution, preventing the wheel from becoming misaligned. Attach the torque wrench to a lug nut and turn it clockwise until you hear a click or feel resistance, indicating the correct torque has been reached. Repeat this process for all the lug nuts, always following the star pattern to maintain balance.
It’s crucial not to over-tighten the lug nuts, as this can damage the threads and the wheel. Similarly, under-tightening can cause the wheel to become loose over time. The torque wrench helps you achieve the precise amount of tightness needed, safeguarding both your wheel and vehicle.
Once all the lug nuts are torqued to the correct specifications, it’s a good idea to double-check each one. This ensures none were missed and confirms the wheel is securely attached. Reattach any wheel covers or hubcaps if your vehicle uses them, and give the wheel a final visual inspection to ensure everything looks correct.
Taking these steps ensures that your tyre fitting is secure, enhancing the overall safety and performance of your vehicle.
Check Tyre Pressure and Adjust if Necessary
Once the tyre is securely fitted and the lug nuts have been properly torqued, the next crucial step is to check and adjust the tyre pressure. Correct tyre pressure ensures optimal vehicle performance, safety, and fuel efficiency. An improperly inflated tyre can lead to uneven wear, reduced traction, and potentially hazardous driving conditions.
Start by locating the recommended tyre pressure for your vehicle. This information can usually be found in the vehicle’s manual, on a sticker inside the driver’s side door, or sometimes within the fuel cap. The recommended pressure is typically given in pounds per square inch (PSI) or bar.
Use a reliable tyre pressure gauge to measure the current pressure of your newly fitted tyre. Remove the valve cap from the tyre’s valve stem and press the gauge firmly onto the valve. Read the measurement displayed on the gauge and compare it to the recommended pressure for your vehicle.
If the tyre pressure is too low, use an air compressor to add air. Attach the compressor’s nozzle to the valve stem and inflate the tyre in short bursts, checking the pressure frequently to avoid over-inflation. If the pressure is too high, release some air by pressing the centre pin inside the valve stem and re-check the pressure.
It’s also a good practice to check the pressure in all four tyres, including the spare if you have one, to ensure they are all correctly inflated. Consistent tyre pressure across all tyres contributes to balanced handling and even tyre wear.
After adjusting the tyre pressure, replace the valve cap to protect the valve from dirt and moisture. Take a moment to visually inspect all tyres for any obvious signs of damage or wear that may need attention.
Maintaining the correct tyre pressure is a simple yet vital aspect of vehicle maintenance that enhances driving safety and extends the life of your tyres. By regularly monitoring and adjusting tyre pressure, you ensure a smoother, more efficient driving experience.
Are you looking for a mobile tyre fitter in Watford? Look no further, contact us for a quick quote.